 使用vue-cli一步步改造成多页面框架
# 下载vue-cli基础框架
$ vue init webpack morepages
1
由于多页面中使用不到路由,不必安装路由
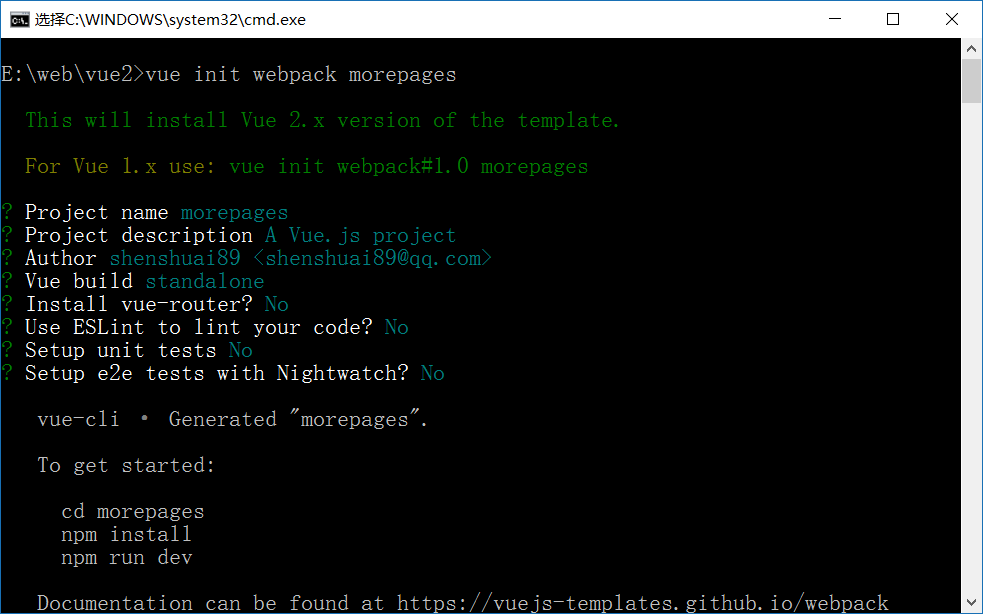 安装完成会创建一个morepages文件夹,里面存放项目文件
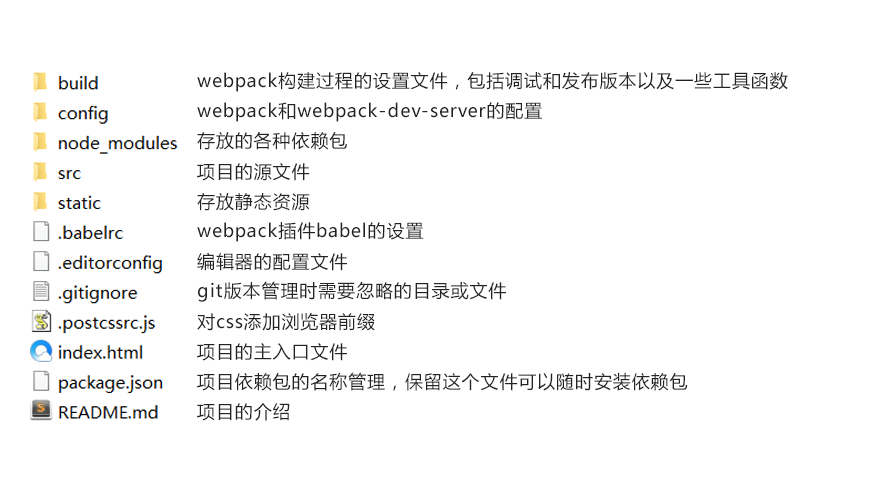
使用$ npm install 安装项目的依赖
安装完成会创建一个morepages文件夹,里面存放项目文件
使用$ npm install 安装项目的依赖
安装成功完成后,可以看到morepages内所有文件夹和文件
# 改造项目src的文件
在src文件夹下新建一个module文件夹,里面创建三个文件夹 index、second、third 在三个文件夹中分别创建html、vue、js文件
index.html
	<!DOCTYPE html>
	<html lang="en">
	<head>
		<meta charset="UTF-8">
		<title>多页面的第一个页面</title>
	</head>
	<body>
		<div id="app"></div>
	</body>
	</html>
1
2
3
4
5
6
7
8
9
10
11
2
3
4
5
6
7
8
9
10
11
index.js
	import 'babel-polyfill'
	import Vue from 'vue'
	import index from './index.vue'

	Vue.config.productionTip = false

	/* eslint-disable no-new */
	new Vue({
	  el: '#app',
	  template: '<index/>',
	  components: { index }
	})
1
2
3
4
5
6
7
8
9
10
11
12
13
2
3
4
5
6
7
8
9
10
11
12
13
index.vue
	<template>
		<div id="index">
			这是index页面<br>
			<hello-world></hello-world>
		</div>
	</template>

	<script>
	import HelloWorld from '../../components/HelloWorld'
	export default{
		data(){
			return{

			}
		},
		mounted(){
			console.log("这是index页面")
		},
		methods:{

		},
		components: {
		    HelloWorld
		}
	}
	</script>

	<style scoped>
		#index {
		  font-family: 'Avenir', Helvetica, Arial, sans-serif;
		  -webkit-font-smoothing: antialiased;
		  -moz-osx-font-smoothing: grayscale;
		  text-align: center;
		  color: #2c3e50;
		}
	</style>
1
2
3
4
5
6
7
8
9
10
11
12
13
14
15
16
17
18
19
20
21
22
23
24
25
26
27
28
29
30
31
32
33
34
35
36
37
38
2
3
4
5
6
7
8
9
10
11
12
13
14
15
16
17
18
19
20
21
22
23
24
25
26
27
28
29
30
31
32
33
34
35
36
37
38
# 修改webpack.base.conf
安装一个依赖包 npm install --save-dev glob 引入依赖
	var glob = require('glob');
	var entries = getEntry('./src/module/**/*.js');
1
2
3
2
3
把module.exports中的entry属性设置为entries;
设置getEntry公用方法
	function getEntry(globPath) {
	  var entries = {},
	    basename, tmp, pathname;
	  glob.sync(globPath).forEach(function (entry) {
	    basename = path.basename(entry, path.extname(entry));
	    tmp = entry.split('/').splice(-3);
	    pathname = tmp.splice(0, 1) + '/' + basename; // 正确输出js和html的路径
	    entries[pathname] = entry;
	  });
	  console.log("base-entrys:");
	  console.log(entries);
	  return entries;
	}
1
2
3
4
5
6
7
8
9
10
11
12
13
14
15
2
3
4
5
6
7
8
9
10
11
12
13
14
15
# 修改webpack.dev.conf
引入依赖包
	let path = require('path');
	let glob = require('glob');
1
2
3
2
3
首先注释掉plugins中的 // new HtmlWebpackPlugin({ // filename: 'index.html', // template: 'index.html', // inject: true // }),
添加新的方法,设置生成文件的路径和名称
	function getEntry(globPath) {
		var entries = {},
		basename, tmp, pathname;
		glob.sync(globPath).forEach(function(entry) {
			basename = path.basename(entry, path.extname(entry));
			tmp = entry.split('/').splice(-3);
			pathname = tmp.splice(0, 1) + '/' + basename; // 正确输出js和html的路径
			entries[pathname] = entry;
		});
		console.log("dev-entrys:");
		console.log(entries);
		return entries;
	}

	var pages = getEntry('./src/module/**/*.html');
	console.log("dev pages----------------------");
	for (var pathname in pages) {
		console.log("filename:" + pathname + '.html');
		console.log("template:" + pages[pathname]);
	// 配置生成的html文件,定义路径等
	var conf = {
		filename: pathname + '.html',
		template: pages[pathname], // 模板路径
	minify: { //传递 html-minifier 选项给 minify 输出
	  removeComments: true
	},
	inject: 'body', // js插入位置
	chunks: [pathname, "vendor", "manifest"] // 每个html引用的js模块,也可以在这里加上vendor等公用模块
	};
	// 需要生成几个html文件,就配置几个HtmlWebpackPlugin对象
	devWebpackConfig.plugins.push(new HtmlWebpackPlugin(conf));
	}
1
2
3
4
5
6
7
8
9
10
11
12
13
14
15
16
17
18
19
20
21
22
23
24
25
26
27
28
29
30
31
32
33
2
3
4
5
6
7
8
9
10
11
12
13
14
15
16
17
18
19
20
21
22
23
24
25
26
27
28
29
30
31
32
33
然后可以执行命令 npm run dev可以打开页面 http://localhost:8086/module/index.html
# 修改webpack.prod.conf
添加新的依赖
var glob = require('glob');
1
2
2
首先注释掉plugins中的new HtmlWebpackPlugin插件
然后在文件最后添加打包文件的配置
	function getEntry(globPath) {
	  var entries = {},
	      basename, tmp, pathname;
	  glob.sync(globPath).forEach(function(entry) {
	    basename = path.basename(entry, path.extname(entry));
	    tmp = entry.split('/').splice(-3);
	    pathname = tmp.splice(0, 1) + '/' + basename; // 正确输出js和html的路径
	    entries[pathname] = entry;
	  });
	  console.log("pro-entrys:");
	  console.log(entries);
	  return entries;
	}

	var pages = getEntry('./src/module/**/*.html');
	console.log("pro pages----------------------");
	for (var pathname in pages) {
	  // 配置生成的html文件,定义路径等
	  var conf = {
	    filename: pathname + '.html',
	    template: pages[pathname], // 模板路径
	    minify: { //传递 html-minifier 选项给 minify 输出
	      removeComments: true,
	      collapseWhitespace: false
	    },
	    inject: 'true', // js插入位置
	    chunks: [pathname, "vendor", "manifest"] // 每个html引用的js模块,也可以在这里加上vendor等公用模块
	  };

	  // 需要生成几个html文件,就配置几个HtmlWebpackPlugin对象
	  module.exports.plugins.push(new HtmlWebpackPlugin(conf));
	}
1
2
3
4
5
6
7
8
9
10
11
12
13
14
15
16
17
18
19
20
21
22
23
24
25
26
27
28
29
30
31
32
33
2
3
4
5
6
7
8
9
10
11
12
13
14
15
16
17
18
19
20
21
22
23
24
25
26
27
28
29
30
31
32
33
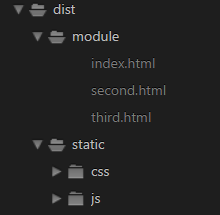
设置完成后,执行npm run build命令, 在项目中生成新的文件夹dist,就可以在服务器中运行module文件下的html文件
编辑 (opens new window)
上次更新: 2025/06/23, 08:09:51