 03-优化字体和图像
原文链接:https://nextjs.org/learn/dashboard-app/optimizing-fonts-images (opens new window)
在上一章中,您学习了如何设计 Next.js 应用程序。让我们继续处理您的主页,添加自定义字体和英雄图像。
# 本章目标
- 如何使用添加自定义字体next/font。
- 如何添加图像与next/image。
- Next.js 中如何优化字体和图像。
# 为什么要优化字体?
字体在网站设计中起着重要作用,但如果需要获取和加载字体文件,则在项目中使用自定义字体可能会影响性能。
Cumulative Layout Shift (opens new window) 是 Google 用来评估网站性能和用户体验的指标。对于字体,布局偏移发生在浏览器最初以后备字体或系统字体呈现文本,然后在加载后将其替换为自定义字体时。这种交换可能会导致文本大小、间距或布局发生变化,从而移动其周围的元素。

当您使用该模块时,Next.js 会自动优化应用程序中的字体next/font。它会在构建时下载字体文件并将其与您的其他静态资产一起托管。这意味着当用户访问您的应用程序时,不会有额外的字体网络请求,从而影响性能。
# 添加主要字体
让我们向您的应用程序添加自定义的 Google 字体,看看它是如何工作的!
在您的/app/ui文件夹中,创建一个名为 的新文件fonts.ts。您将使用此文件保存将在整个应用程序中使用的字体。
Inter从模块导入字体 next/font/google 这将是您的主字体。然后,指定子集 (opens new window)您想要加载。在本例中,'latin':
import { Inter } from 'next/font/google';

export const inter = Inter({ subsets: ['latin'] });
2
3
最后,将字体添加到/app/layout.tsx中的<body>元素中:
import '@/app/ui/global.css';
import { inter } from '@/app/ui/fonts';

export default function RootLayout({
  children,
}: {
  children: React.ReactNode;
}) {
  return (
    <html lang="en">
      <body className={`${inter.className} antialiased`}>{children}</body>
    </html>
  );
}
2
3
4
5
6
7
8
9
10
11
12
13
14
通过添加Inter到<body>元素,字体将应用于整个应用程序。在这里,你还添加了 Tailwindantialiased (opens new window)使字体更平滑的类。这个类不是必须使用的,但它可以增加一种美感。
导航到浏览器,打开开发工具并选择元素body。您应该看到Inter并且Inter_Fallback现在已在样式下应用。
# 练习:添加辅助字体
您还可以向应用程序的特定元素添加字体。
现在轮到你了!在你的fonts.ts文件中,导入一个名为的辅助字体Lusitana并将其传递给文件<p>中的元素/app/page.tsx。除了像以前一样指定子集之外,你还需要指定字体粗细。
准备好后,展开下面的代码片段来查看解决方案。
提示:
- 如果您不确定要传递给字体的权重选项,请检查代码编辑器中的 TypeScript 错误。
- 访问Google 字体 (opens new window)网站并搜索以Lusitana查看有哪些可用选项。
- 请参阅有关添加多种字体 (opens new window)和完整选项列表的 (opens new window)文档。
# 参考
import { Inter, Lusitana } from 'next/font/google';

export const inter = Inter({ subsets: ['latin'] });

export const lusitana = Lusitana({
  weight: ['400', '700'],
  subsets: ['latin'],
});
2
3
4
5
6
7
8
import AcmeLogo from '@/app/ui/acme-logo';
import { ArrowRightIcon } from '@heroicons/react/24/outline';
import Link from 'next/link';
import { lusitana } from '@/app/ui/fonts';

export default function Page() {
  return (
    // ...
    <p
      className={`${lusitana.className} text-xl text-gray-800 md:text-3xl md:leading-normal`}
    >
      <strong>Welcome to Acme.</strong> This is the example for the{' '}
      <a href="https://nextjs.org/learn/" className="text-blue-500">
        Next.js Learn Course
      </a>
      , brought to you by Vercel.
    </p>
    // ...
  );
}
2
3
4
5
6
7
8
9
10
11
12
13
14
15
16
17
18
19
20
最后,该<AcmeLogo />组件还使用了 Lusitana。为了防止出现错误,它已被注释掉,您现在可以取消注释它:
// ...

export default function Page() {
  return (
    <main className="flex min-h-screen flex-col p-6">
      <div className="flex h-20 shrink-0 items-end rounded-lg bg-blue-500 p-4 md:h-52">
        <AcmeLogo />
        {/* ... */}
      </div>
    </main>
  );
}
2
3
4
5
6
7
8
9
10
11
12
太好了,您已将两种自定义字体添加到您的应用程序中!接下来,让我们将英雄图像添加到主页。
# 为什么要优化图像
Next.js 可以在顶级文件夹下提供静态资源/public (opens new window)(例如图像) 。 里面的文件/public可以在你的应用程序中引用 使用常规 HTML,您可以按如下方式添加图像:
<img
  src="/hero.png"
  alt="Screenshots of the dashboard project showing desktop version"
/>
2
3
4
但是,这意味着您必须手动:
- 确保您的图像能够适应不同的屏幕尺寸。
- 为不同的设备指定图像大小。
- 防止图像加载时布局发生偏移。
- 延迟加载用户视口之外的图像。
图像优化是 Web 开发中的一个大主题,本身可以视为一门专业。您可以使用该next/image组件自动优化图像,而无需手动实施这些优化。
# 组件
该<Image/>组件是HTML标签的扩展<img>,并带有自动图像优化功能,例如:
- 加载图像时自动防止布局偏移。
- 调整图像大小以避免将大图像传送到视口较小的设备。
- 默认情况下延迟加载图像(图像进入视口时加载)。
- 以现代格式(如WebP) (opens new window)提供图像和AVIF (opens new window),当浏览器支持时。
# 添加桌面端英雄图像
让我们使用<Image>组件。如果你查看文件夹内部/public,你会看到有两个图像:hero-desktop.png和hero-mobile.png。这两个图像完全不同,并且将根据用户的设备是桌面设备还是移动设备来显示它们。
在您的/app/page.tsx文件中,从以下位置导入组件next/image (opens new window)。然后,在评论下添加图片:
import AcmeLogo from '@/app/ui/acme-logo';
import { ArrowRightIcon } from '@heroicons/react/24/outline';
import Link from 'next/link';
import { lusitana } from '@/app/ui/fonts';
import Image from 'next/image';

export default function Page() {
  return (
    // ...
    <div className="flex items-center justify-center p-6 md:w-3/5 md:px-28 md:py-12">
      {/* Add Hero Images Here */}
      <Image
        src="/hero-desktop.png"
        width={1000}
        height={760}
        className="hidden md:block"
        alt="Screenshots of the dashboard project showing desktop version"
      />
    </div>
    //...
  );
}
2
3
4
5
6
7
8
9
10
11
12
13
14
15
16
17
18
19
20
21
22
在这里,您将宽度设置为1000像素,高度设置为760像素。设置图像的宽度和高度以避免布局偏移是一个很好的做法,这些宽度和高度应该与源图像的纵横比相同。
您还会注意到,该类hidden用于从移动设备屏幕上的 DOM 中删除图像,以及md:block用于在桌面屏幕上显示图像。
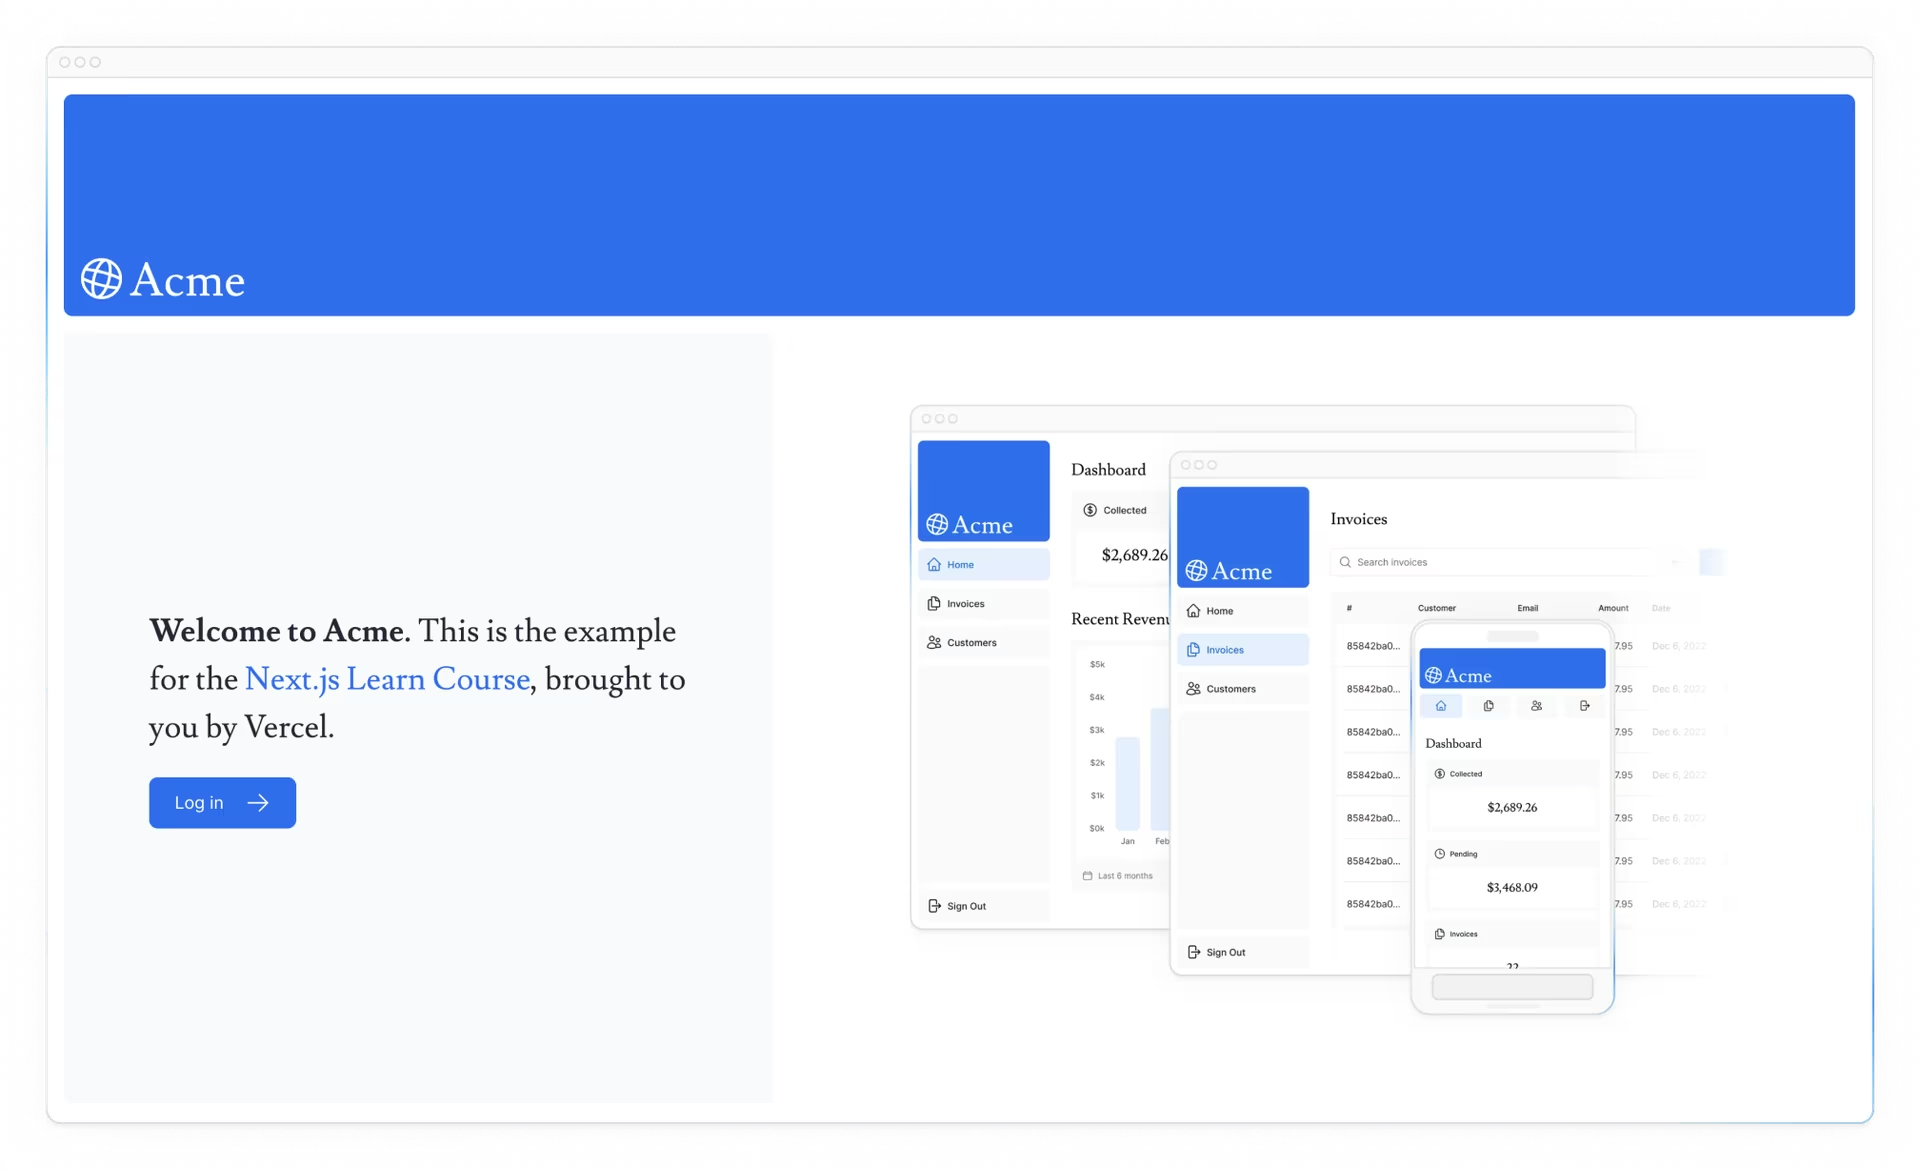
您的主页现在应如下所示:

# 练习:添加移动端英雄图像
现在轮到你了!在您刚刚添加的图像下,为hero-mobile.png添加另一个<image>组件。
- 图像的宽度应为560像素,高度应为620像素。
- 它应该显示在移动屏幕上,隐藏在桌面上——您可以使用开发工具检查桌面和移动图像是否正确交换。
- 准备好后,展开下面的代码片段以查看解决方案。
import AcmeLogo from '@/app/ui/acme-logo';
import { ArrowRightIcon } from '@heroicons/react/24/outline';
import Link from 'next/link';
import { lusitana } from '@/app/ui/fonts';
import Image from 'next/image';

export default function Page() {
  return (
    // ...
    <div className="flex items-center justify-center p-6 md:w-3/5 md:px-28 md:py-12">
      {/* Add Hero Images Here */}
      <Image
        src="/hero-desktop.png"
        width={1000}
        height={760}
        className="hidden md:block"
        alt="Screenshots of the dashboard project showing desktop version"
      />
      <Image
        src="/hero-mobile.png"
        width={560}
        height={620}
        className="block md:hidden"
        alt="Screenshot of the dashboard project showing mobile version"
      />
    </div>
    //...
  );
}
2
3
4
5
6
7
8
9
10
11
12
13
14
15
16
17
18
19
20
21
22
23
24
25
26
27
28
29
# 推荐阅读
关于这些主题还有很多需要学习的内容,包括优化远程图像和使用本地字体文件。如果您想深入了解字体和图像,请参阅: